 Save
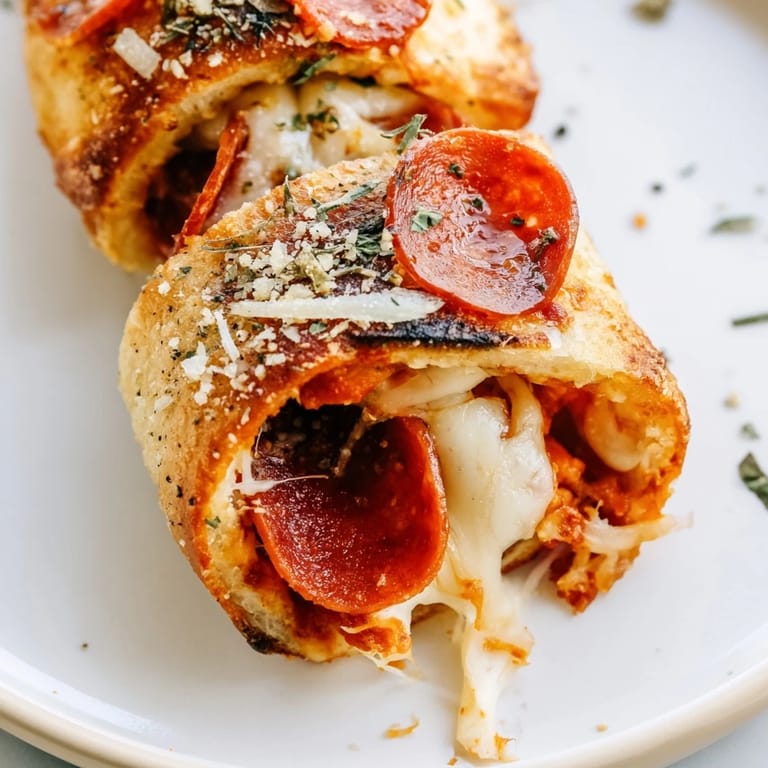
Save The first time I made these air fryer pizza rolls, I wasn't trying to jump on a trend—I was just trying to feed four hungry kids who'd rejected my carefully planned dinner. I had a tube of pizza dough sitting in the fridge and thirty minutes before everyone mutinied, so I started rolling, filling, and slicing with zero expectations. What came out of the air fryer ten minutes later was pure magic: golden, crispy little pockets that somehow managed to be both elegant enough for guests and casual enough for a Tuesday night. That batch disappeared so fast I barely got to taste one, and I've been making them ever since.
I remember bringing a batch to a book club meeting on a whim, thinking they'd be a nice addition to the snacks table. One woman took a bite, closed her eyes like she was experiencing something profound, and asked for my recipe before she'd even swallowed. I told her the secret wasn't really a secret—it was just the air fryer's ability to make everything taste like it came from an actual pizzeria instead of someone's kitchen. She made them the next week and texted me a photo of her kids actually requesting them for lunch.
Ingredients
- 1 package refrigerated pizza dough (about 400 g / 14 oz): This is the foundation, and honestly, the quality matters more than you'd think—some brands are drier and harder to work with, so if your first roll sticks like crazy, try switching brands next time.
- 120 g (1 cup) shredded mozzarella cheese: Low-moisture is crucial here; it won't release too much water and make your filling soggy, which I learned the hard way after reaching for the fresh stuff once.
- 60 g (1/2 cup) mini pepperoni slices: The size matters because regular pepperoni pieces are too big and poke through the dough; these little ones tuck in perfectly.
- 4 tbsp pizza sauce: Don't overload this—restraint is what keeps these rolls crispy instead of damp.
- 2 tbsp grated Parmesan cheese: This adds that sharpness that makes people ask what the secret ingredient is, even though it's just Parmesan.
- 1/2 tsp dried Italian herbs: A small amount is all you need; fresh herbs will release too much moisture and make everything soggy.
- 1 egg, beaten: This acts as your glue and gives you that beautiful golden finish that makes them look bakery-quality.
- Cooking spray or olive oil spray: Either works, but the spray ensures even coverage without oversaturating the basket.
Tired of Takeout? 🥡
Get 10 meals you can make faster than delivery arrives. Seriously.
One email. No spam. Unsubscribe anytime.
Instructions
- Get your air fryer ready:
- Preheat it to 190°C (375°F) for 5 minutes so the first batch hits hot air and gets that immediate golden crust you're after.
- Roll out your canvas:
- Lightly flour your surface and stretch the dough into a rectangle about 30 x 25 cm—don't worry about perfection; slightly uneven is totally fine and honestly more homemade looking.
- Spread the sauce:
- Use the back of a spoon to distribute the pizza sauce evenly, stopping about 1 cm from the edges so it doesn't squeeze out when you roll.
- Layer your fillings:
- Sprinkle the mozzarella, Parmesan, pepperoni, and herbs across the sauce in an even layer—you want every bite to have everything, so take a second to distribute it well.
- Roll it up tight:
- Starting from a long edge, roll the dough tightly like you're wrapping a sleeping bag, and pinch the seam closed so nothing escapes during cooking.
- Slice with confidence:
- Use a sharp knife and wipe it between cuts to keep things clean; you should get about 24 pieces, but exact size matters less than consistency.
- Seal the edges:
- Brush beaten egg on the cut sides of each roll to help them stay sealed and golden—this is the step that makes them look fancy.
- Prepare your air fryer:
- Spray the basket lightly with cooking spray so nothing sticks, then arrange the rolls in a single layer with a little space between each one.
- Final egg wash:
- Brush the tops with more beaten egg for that beautiful golden color that makes people actually excited to eat them.
- Air fry until golden:
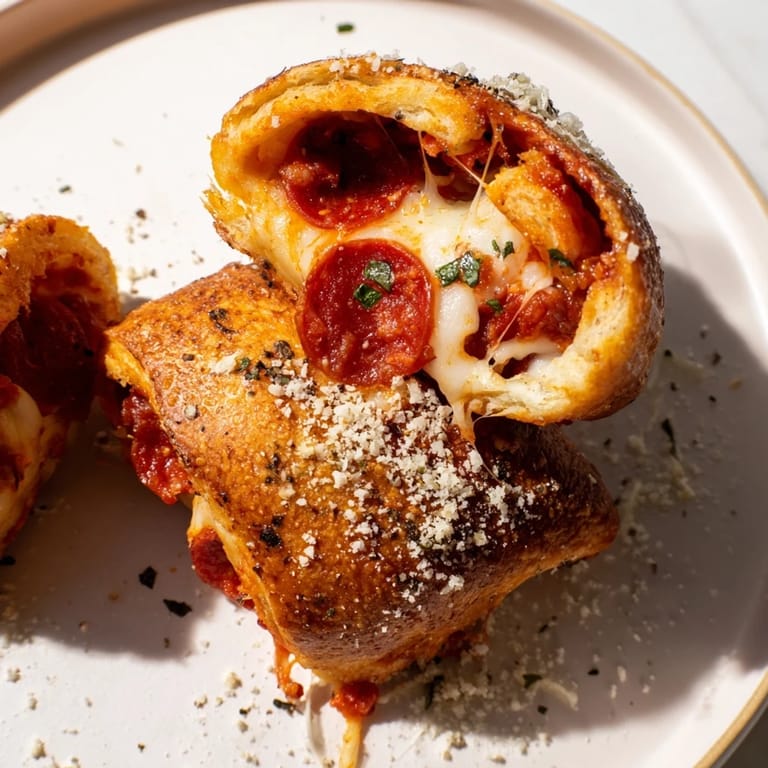
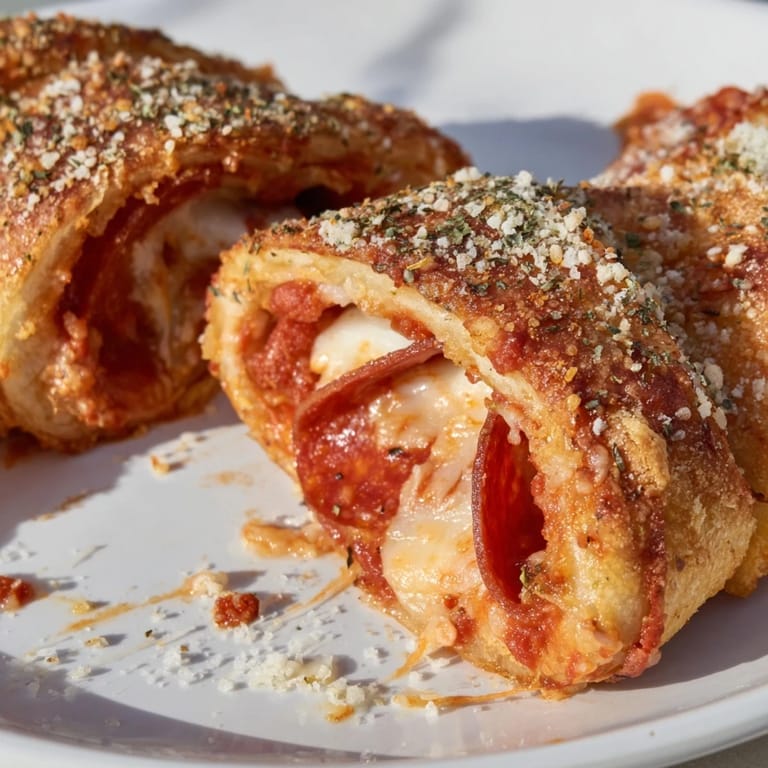
- Cook for 8 to 10 minutes at 190°C, flipping halfway through so they brown evenly on all sides—you'll know they're done when they're golden and the cheese is just barely visible at the edges.
- Cool and serve:
- Let them rest for 2 to 3 minutes so the cheese sets slightly, then serve immediately with extra pizza sauce for dipping.
 Save
Save These rolls have become the thing I make when I want to feel like a good host without actually working hard. There's something about setting a platter of them down and watching people's faces light up that never gets old, especially when they realize they're homemade.
Customization Ideas That Actually Work
The beauty of these is that they're a platform for whatever you have on hand or whatever you're craving. I've done a roasted vegetable and ricotta version that my vegetarian friend actually requested, and a spicy version with jalapeños that disappeared faster than the original. The rule I follow is to keep the total filling amount about the same so the rolls cook evenly—more stuff doesn't equal better, it just equals potential leaks and uneven cooking.
- Try a white sauce version with ricotta, mozzarella, and fresh basil for something totally different.
- Roasted mushrooms and caramelized onions are unexpectedly sophisticated and feel almost gourmet.
- A meat lovers version with pepperoni, cooked sausage, and bacon is chaos in the best way.
Storage and Make-Ahead Magic
You can assemble these rolls completely the day before, pop them in the fridge on a sheet tray, and air fry them straight from cold—just add a minute or two to the cooking time. I've also successfully frozen them after slicing (before cooking) and pulled them out whenever I needed a quick appetizer or snack. The frozen-to-cooked version is actually my favorite because they seem to steam from the inside while crisping on the outside, making them even more gooey.
Why the Air Fryer Changes Everything
Before I started making these in the air fryer, I tried baking them in the regular oven and they always came out either soft on the outside or dried out on the inside. The air fryer's circulating heat actually gets the outside crispy while keeping the inside tender and cheesy in a way that feels genuinely impressive. It's honestly one of the few things that made me actually like my air fryer instead of just tolerating it as a kitchen gadget.
- If you don't have an air fryer, you can bake these at 200°C for 12 to 15 minutes, but they won't have the same crispy exterior.
- The air fryer basket capacity might mean you need to cook in batches, but that's actually a feature because it keeps the basket from getting crowded.
- Clean your air fryer basket immediately after cooling to prevent cheese from hardening on it—a quick rinse makes all the difference.
 Save
Save These pizza rolls have become my go-to when I want to feel like I've done something impressive without the stress. They're the kind of recipe that makes people happier than the effort required, which is honestly all any of us really want from cooking.
Recipe FAQs
- → How do I keep the rolls from getting soggy inside?
Ensure the dough is rolled tightly and sealed well to prevent sauce leakage. Using the egg wash helps create a seal and crisp crust.
- → Can I make these rolls vegetarian?
Yes, simply replace pepperoni with diced vegetables like bell peppers or mushrooms for a vegetarian-friendly option.
- → What’s the best way to reheat leftover pizza rolls?
Reheat in the air fryer for a few minutes to maintain crispiness, or warm in an oven at moderate temperature to avoid sogginess.
- → Can I use gluten-free dough instead of regular pizza dough?
Gluten-free dough works well; just be cautious with handling as it may be more delicate when rolling and sealing the filling.
- → How do I prevent the rolls from sticking to the air fryer basket?
Lightly spray the air fryer basket with cooking or olive oil spray before arranging the rolls for cooking.